The Best Banana Pudding Recipe – Step By Step:- There is a dessert known as banana pudding that has been around for a very long time and has never failed to bring delight to whatever occasion that it is served at. It is a dish that is sure to be enjoyed by a large number of individuals, and you should include it in your collection of recipes. You should definitely include this food in your collection because of its velvety consistency, opulent flavour, and calming familiarity.
The Best Banana Pudding Recipe – Step By Step Guide
These are all reasons why it is suitable to include this dish. In this blog post, we are going to go into the nuances of making the ideal banana pudding, which will leave everyone wanting more. This pudding will leave everyone wanting more.uide
Ingredients
To start, gather the following ingredients:
- 1 box of vanilla wafers
- 4 ripe bananas
- 2 cups of whole milk
- 1 can (14 ounces) of sweetened condensed milk
- 1 box (3.4 ounces) of instant vanilla pudding mix
- 1 package (8 ounces) of cream cheese, softened
- 1 teaspoon of vanilla extract
- 2 cups of heavy cream
- 1/4 cup of powdered sugar
Also read:-Best Slow Cooker French Onion Soup Recipe -step By Step Guide
Instructions
- Putting the whole milk and instant vanilla pudding mix into a big mixing basin and whisking them together until they are entirely smooth and have thickened is the first step in making the pudding mixture. Because of this, you will be able to prepare the pudding mixture. In terms of time, it is anticipated that this process will take approximately two minutes. Putting the bowl in the refrigerator while you continue to prepare the remaining components is the best way to guarantee that it will be sufficiently chilled once you have finished preparing the remaining components. This will allow you to ensure that the bowl is thoroughly chilled.
- To begin, the peels of bananas that have reached their full maturity should be removed. Next, the bananas should be sliced into rounds that are roughly one fourth of an inch thick. Finally, the bananas should be included into the dish. Until a later point in the day, you should take a break.
- After placing the powdered sugar and heavy cream in a separate mixing bowl, the two should be mixed together until they form stiff peaks with the use of a whisk. The preparation of the whipped cream will begin with this phase, which will be the first step. The procedure of making the whipped cream will begin once this step has been completed. Take the essential precautions to prevent yourself from overworking yourself and putting yourself in danger. Until a later point in the day, you should take a break.
- After the cream cheese has been softened, transfer it to a separate bowl and beat it until it is completely smooth and creamy. This will be the preparation of the cream cheese mixture. This will be the initial step in the process of getting ready. The process of getting ready will begin with this step, which will be the first step. Vanilla extract and sweetened condensed milk should be added in a slow and steady stream while the mixture is being thoroughly blended and smoothed out for the best results. It is important to carry out this step while the mixture is being continuously mixed together.
- In order to finish the process of merging the components, carefully combine the whipped cream that has been created into the cream cheese mixture until it is entirely incorporated. This will ensure that the process is finished. In order to guarantee that all of the components are thoroughly mixed together, it is necessary to blend the ingredients together. As a consequence of this, the texture of your pudding will wind up being one that is not only light and airy, but also one that is acceptable to the palate. Additionally, this will be the case.
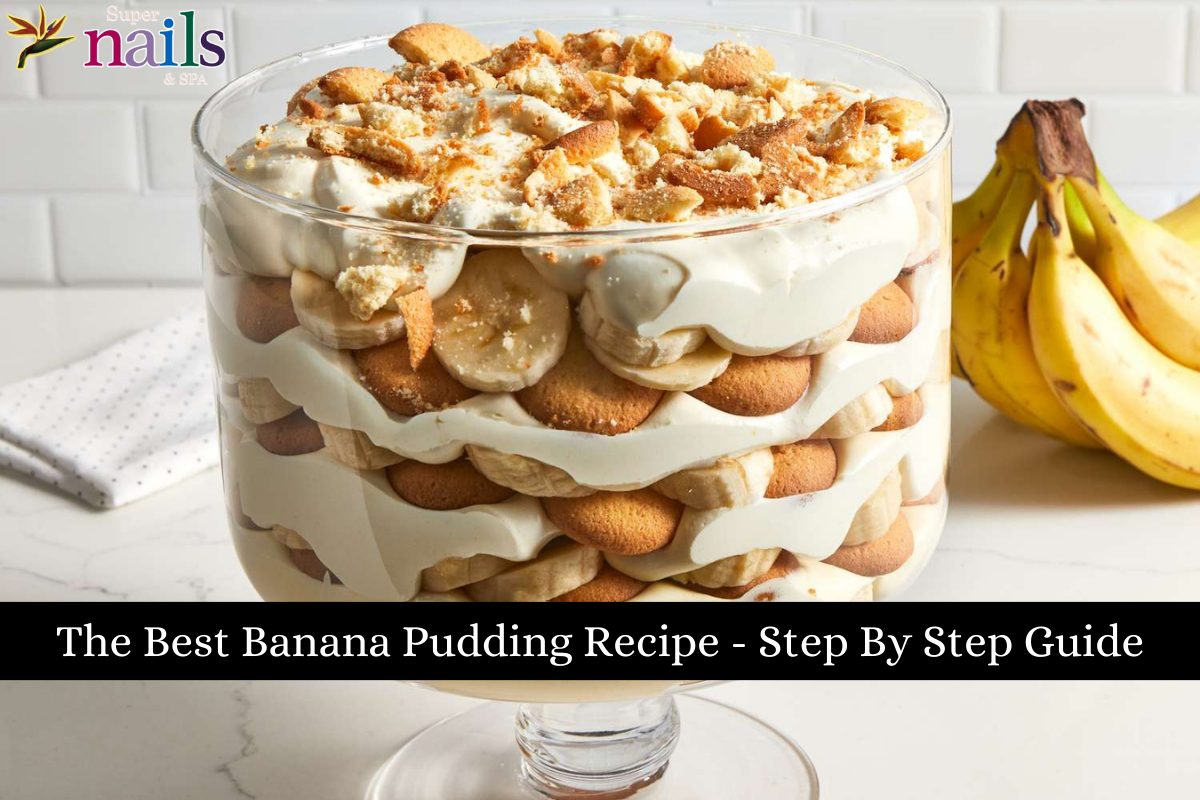
- The pudding can be assembled by placing the ingredients in a large glass trifle dish or in individual dishes that are made for serving. This will allow the dessert to be assembled. As a consequence of this, the pudding will be able to be constructed effectively. To get started, it is suggested that you start by arranging vanilla wafers in a single layer on the bottom of the dish. Following that, carrying on with the process of stacking sliced bananas on top of the vanilla wafers. Following that, you will be able to proceed to the subsequent stage, which is to stack the materials that are listed below. The following step is to use a spoon to spread an even layer of the cream cheese mixture over the bananas, making sure that it has a uniform appearance across the entire layer itself. This is the next step. Once all of the components have been employed, the layers should be continued until the final layer is formed of the cream cheese mixture that is poured on top of the layer that came before it. This should be done until all of the components have been utilised.
- If you wish to serve the pudding after it has cooled, you should cover it with plastic wrap and place it in the refrigerator for at least four hours, preferably overnight. This will allow the pudding to reach the desired temperature. Because of this, the flavours will be able to complement one another, and the pudding will become more substantial. The dessert can be garnished with additional sliced bananas and crushed vanilla wafers right before it is served. This is done in order to provide an additional layer of taste and texture to the meal, which is already great. The garnish can be applied right before the dessert is served.
Conclusion
There you have it: the ideal recipe for banana pudding, which is certain to enchant your taste senses and leave your guests in awe. Your hunger for a sweet delicacy is sure to be satiated by this creamy delight, regardless of whether you are hosting a family gathering, a potluck supper, or simply want to indulge in something sweet. Take pleasure in each and every bite of this time-honored delicacy, and don’t be shocked if it inevitably becomes a regular part of your dessert rotation!